
First-run walkthrough
from opening the app to a first order.
A plain-language tour, screen by screen. Part one is what every trader sees: create or import a wallet, lock the app, fund it, place a first order. Part two is what you do once as the operator: switch trading on and set your builder fee. No programming needed for either.
01Before you start
- AXIS runs: in Chrome with
flutter run -d chrome(Quick start), on a phone, or on your deployed web address. - Paper and a pen for the recovery phrase.
- For a real first order: some native USDC on Arbitrum One (at least 5 USDC, plus enough for the $10 minimum order value at your leverage) and a little ETH on Arbitrum for the deposit's gas.
- To practise without real money, use a testnet build instead (how).
Perpetual futures use leverage. A position can be liquidated and the whole margin lost. Start with an amount you can afford to lose.
02Trader step 1: create or import a wallet
- Open the appA short tour explains that keys stay on the device. Press Next or Skip.
- Choose the phrase length12 words (standard) or 24 words (maximum).
- Create New WalletThe app shows the recovery phrase. Write every word down, in order, on paper. Do not take a screenshot.
- Prove you saved itThe app asks for three of the words in order. Only then is the wallet created.
- Or: Import Existing WalletEnter a 12 or 24-word recovery phrase, or switch to Private Key (64 hexadecimal characters). Only do this on your own private device.
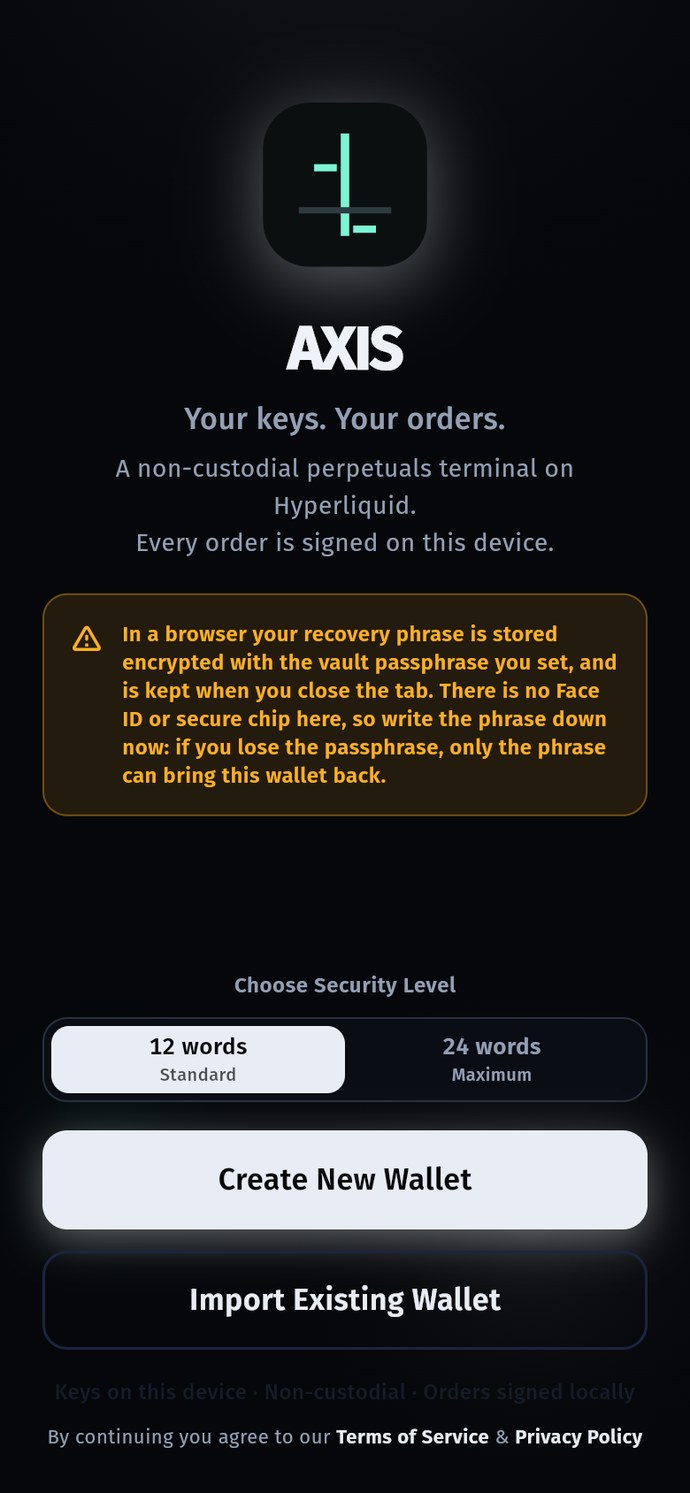
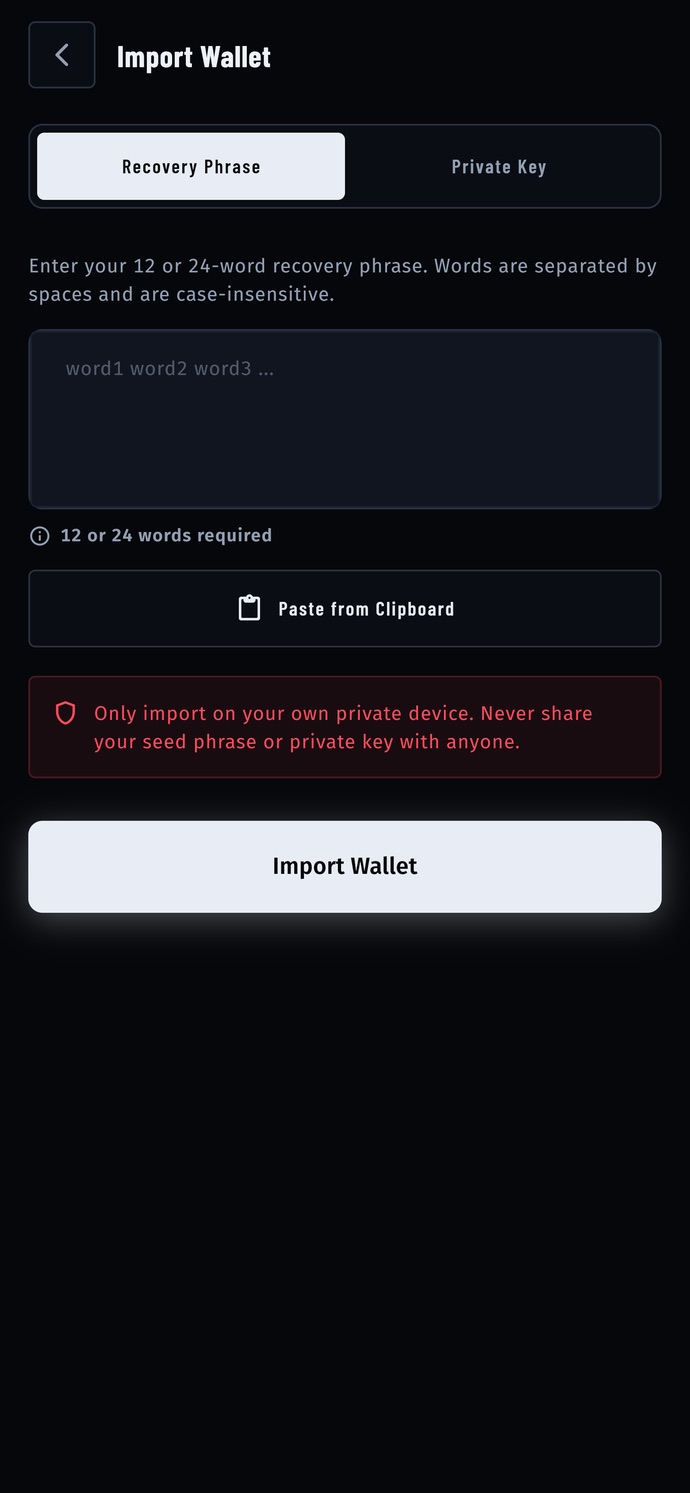
Web build only: before the wallet is saved, the app asks for a vault passphrase (at least 10 characters, typed twice). It encrypts the recovery phrase in this browser, is asked for again after a reload and before showing the phrase, exporting a backup or moving funds, and cannot be reset: if it is lost, the recovery phrase is the way back. The amber note on the first web screen (above) says so: the phrase is stored encrypted with the vault passphrase and kept when the tab closes, and only the written-down phrase can bring the wallet back if the passphrase is lost (details). The live demo skips this screen: it runs on a sample address with no key and no vault.
03Trader step 2: lock the app
- Open Account → App lock
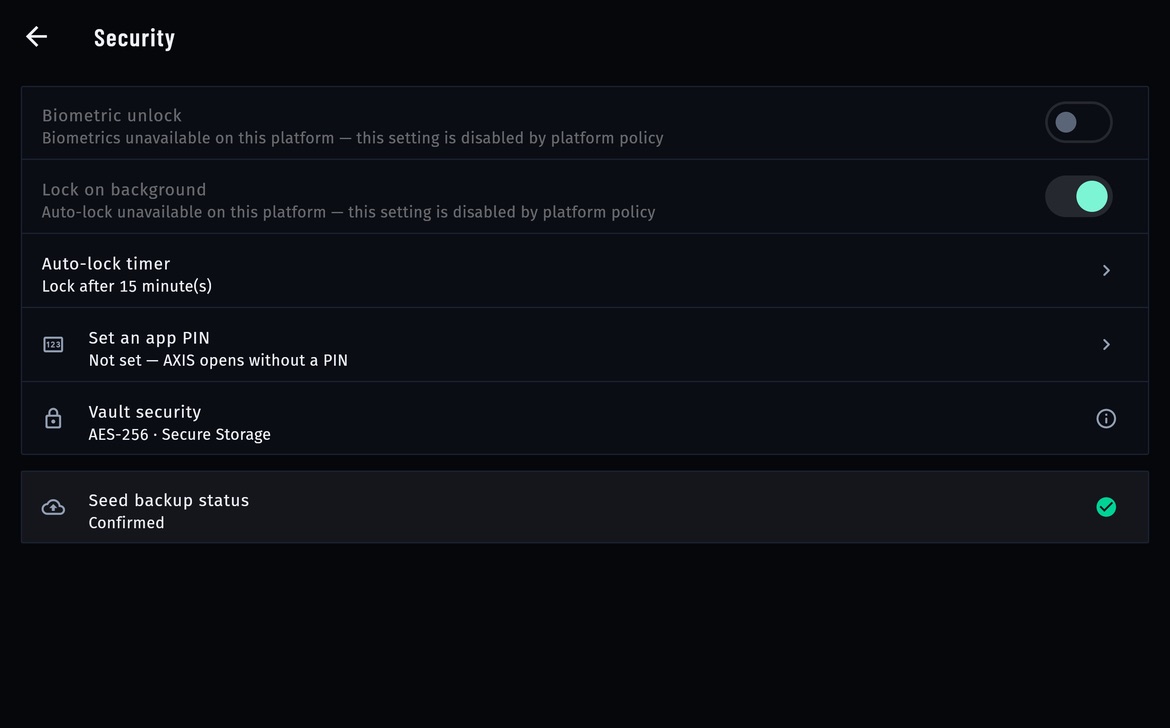
- Set an app PINType a PIN and confirm it. From now on AXIS opens with the PIN screen.
- Biometric unlockOn phones with Face ID, Touch ID or a fingerprint reader, switch it on here.
- Auto-lock timerHow long the app may stay in the background before it asks again. The default is 15 minutes.
The PIN protects the screen. The recovery phrase is still the only way to restore the wallet on another device (what if the device is lost).
04Trader step 3: fund the trading account
- Send USDC to your AXIS address on ArbitrumFrom an exchange or another wallet. It must be native USDC on Arbitrum One, not USDC.e and not another network. Also send a little ETH on Arbitrum for gas.
- Open Trade → DepositEnter the amount (minimum 5 USDC) and confirm. The app sends the USDC to Hyperliquid's bridge on Arbitrum. Once sent it cannot be cancelled.
- Wait for the creditThe app watches the account and says Deposit credited to your trading account. This usually takes about a minute. If it says it is still waiting, check again in a few minutes (if not).
A capture of the deposit sheet is not included in these docs yet; the demo build does not send deposits.
05Trader step 4: the first order
- Pick a marketIn Markets, tap a contract such as BTC-PERP.
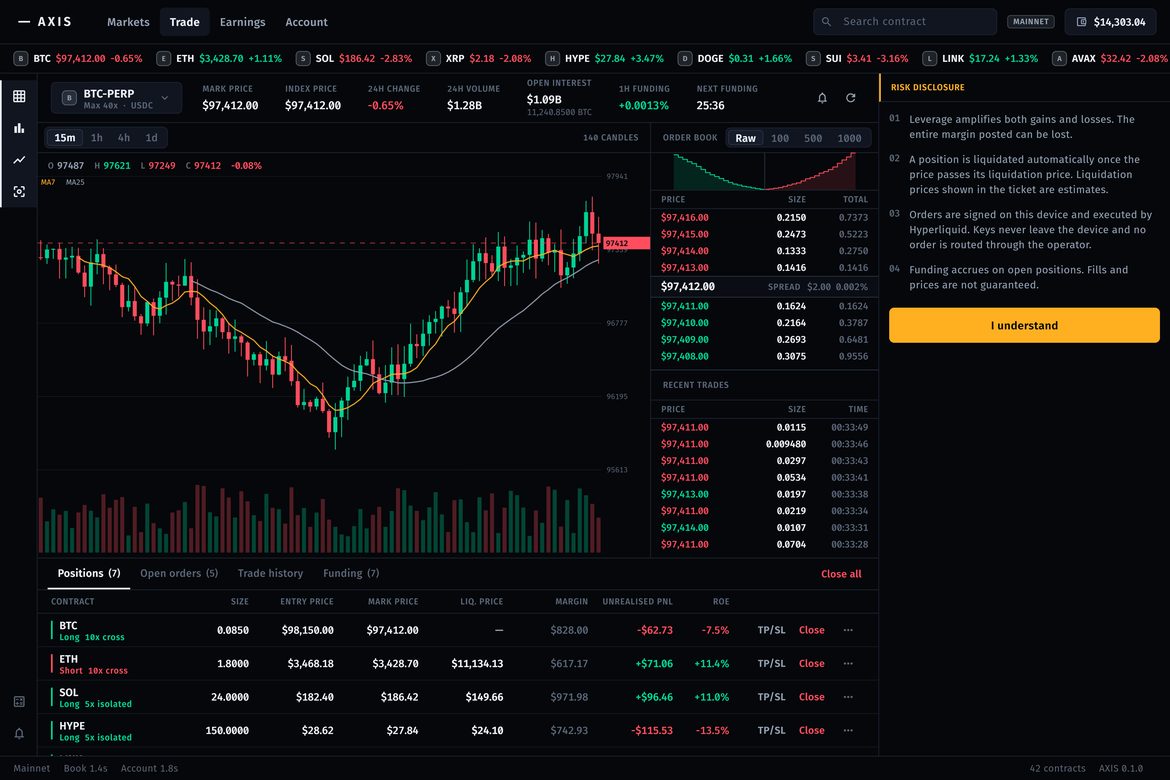
- Read and accept the risk disclosureBefore the first order AXIS shows four points: leverage can lose the whole margin, liquidation prices are estimates, orders are signed on the device, funding accrues on open positions. Press I understand.
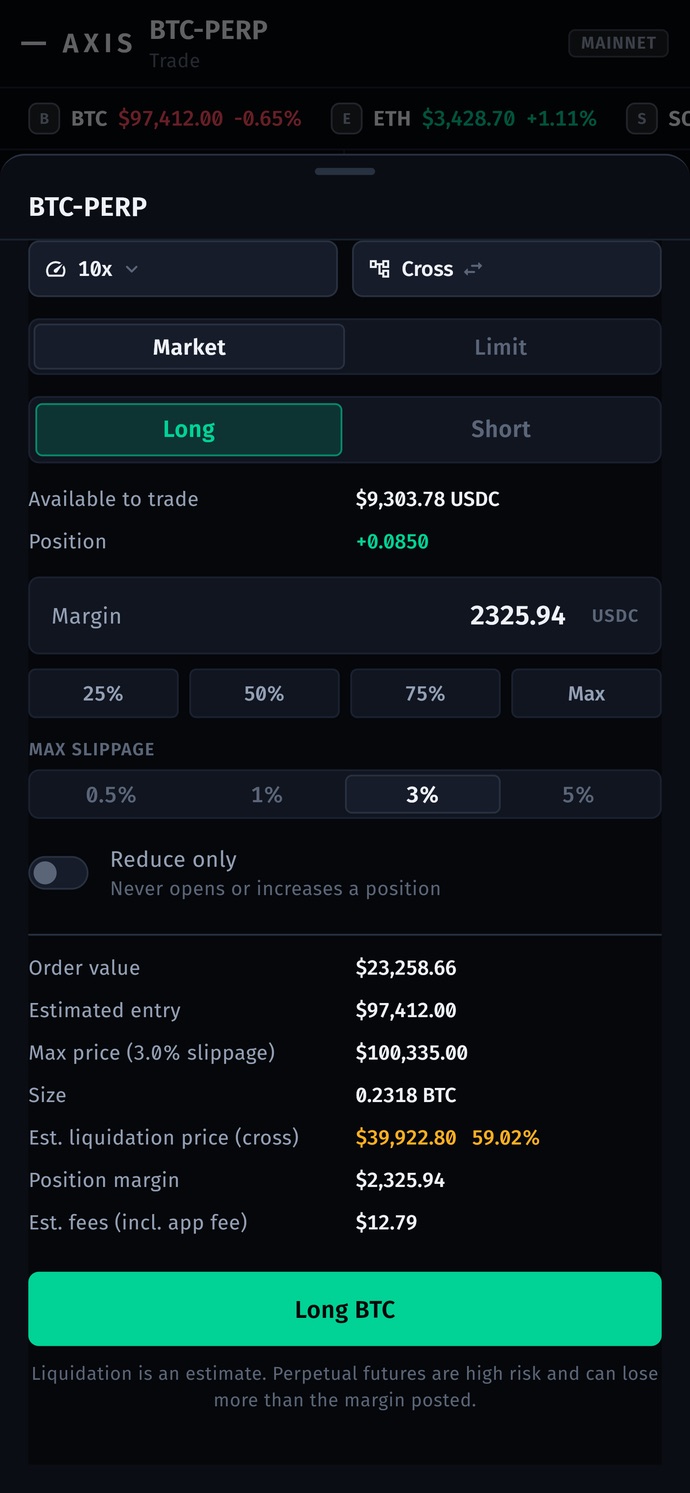
- Fill the ticketChoose leverage and Cross or Isolated, Market or Limit, Long or Short, then the margin. Below, the ticket shows the order value, estimated entry, the worst price at your slippage, size, estimated liquidation price, margin and estimated fees.
- The checksThe ticket refuses an order below $10 in value, a size that rounds to zero, or a market with no live price, and says why. If the operator charges a builder fee, the first order asks the wallet to approve it, naming the rate; declining cancels the order.
- Place itThe order is signed on the device and sent to Hyperliquid. Positions and open orders appear under the chart.
06Operator: switch trading on and set your fee
Do this once, after Installation. You need the address of a wallet you control that holds at least 100 USDC of Hyperliquid perps collateral (why).
- Try it on your own deviceOpen Account → Operator console. Under Surfaces, switch HYPERLIQUID PERPS on.
- Set the builder feeUnder Earning — builder fee: switch BUILDER FEE on, paste your BUILDER ADDRESS and press SET, enter a PERPS FEE between 1 and 100 tenths of a basis point (10 = 0.01 %) and press SET. Wrong values are refused with the reason.
- Check the Earnings tabPress RECHECK. It should read BUILDER CODE ATTACHED, and Prerequisites should show your collateral at or above 100 USDC.
- Place one small orderApprove the fee when asked. Back on Earnings, ORDERS CARRY THE FEE reads YES.
- Publish it for everyoneThe console changed only your device. Press COPY AS JSON at the bottom of the console, put the result in your
config.jsonand upload it to your host (how). From the next start, every user's app uses it.
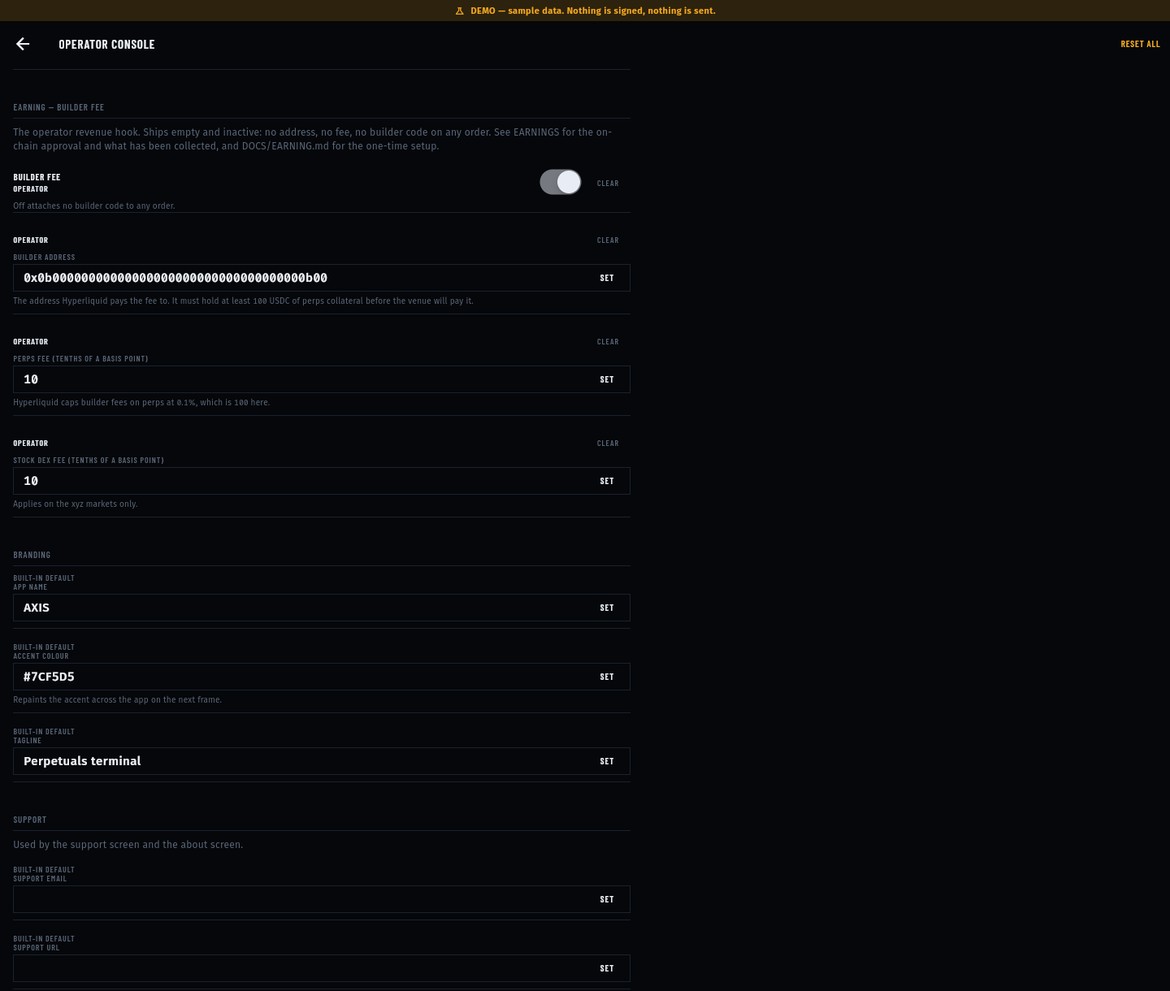
What else you can change without code, and what needs a rebuild: Operator console → What you can change.